Showing posts with label diy. Show all posts

Thursday, October 17, 2013

Refinishing furniture with Chalk Paint for First timers


There are a million Chalk Paint How to's on the interwebz, but I finally decided take a stab at it myself. I learn best by doing, so there was only so much I could read before I actually bit the bullet myself. My motivation? We have a few small furniture pieces we need on the 1st and 2nd floor, and I'm all about finding them on craigslist and refinishing. On Saturday night we stayed in, and I was completely determined to finish an old night stand that we are now using as a lamp stand on the 1st floor. 
 
Now, Annie Sloan paint isn't cheap, it runs at $39 smackaroos a can - which is supposed to cover two large furniture pieces - and if you wanna cover it with wax, that is another $30 bucks a can. Overall, it gives furniture a great shabby chic look, so I think it's very much worth it.  Especially when you compare it to buying NEW furniture. I mean geesh, we all know that can annihilate any bank account. 
 
So, as I know very little about this paint - I called up my sis-in-law Sara, and she gave me the skinny. She's the expert chalk painter in the fam, and here is what I learned. 
 
First find it - Annie Sloan Paint isn't sold everywhere. Go to their website and find out who sells it. I bought my two cans at Michella's in Old Town Spring. What I liked about this place was the samples they had. Sounds weird, but keep reading.  

Wax on / Wax off - Every chalk paint color can be fininished with clear wax, dark wax, or a combination of both. Or you can forgo wax all together - to really get the chalk look. Your waxing decision will make a big difference in the final look of your piece. These sample boards below really helped me decide: 


Now for materials - I've got all the usual suspects below. But most importantly - the dish rag and water (not pictured here) are the most important. And as soon as you open up a can an door into your paint container - seal that sucker right back up immediately. Exposure to air changes the consistency - which you don't want to happen to unused paint. 

Before we get started - here's my little night stand turned lamp table before - pretty ugly - I know. I liked this piece because it was small, and I figured would serve as good practice. I recommend everyone start out small, because even this small piece took me about eight hours (four on Saturday, 4 on Sunday). 


Now, I've sanded this piece, which isn't always necessary with chalk paint. But since this piece was dark, and my paint was light - I knew it was required. I also think any piece looks better if sanded. Obviously it is up to you. I have also heard about liquid sand paper to save time, but I didn't have any and will try that on my next project. 
 
Then I started painting. This was after the first coat. What's most important is I dipped my brush in water occasionally, then wiped off excess on the rag to help the paint go further. Some people dilute the paint outright, but I heard this brush in the water trick is easier from Sara. 


Here is the rag and water bucket toward the end of the project 


On Sunday I was finally finished. I'd say I put three coats everywhere. Places that weren't sanded well probably had four coats. Excuse my old, ugly hardware.
I plan to get something new in the future. 

this color is Arles - and has no wax finish

And that was my first go at chalk-paint furniture painting! I wish I was looking forward to repainting the six chairs in my dinning room. 


But I am not. (So much left to do in this room!!) 

Over and out!! -Tessy. 

Sunday, October 6, 2013

A Pumpkin Weekend in Pictures

It's been so crazy town around these parts as of late. Matthew has been traveling for work which has me all out of sync. After a crazy Friday, I had a much needed weekend with fam.
It's always great to just hit the restart button. 
 
 me and my nephew.
 
We started our pumpkins on Saturday night. I used folkart acrylic craft paint from Walmart. It was $2 a bottle. We painted one coat, then after the second coat, while it was still weat - we glitter bombed the top half of a mid-sized pumpkin. We used regular 2 dollar glitter and painter's tape.
 It was awesome!!
 
note: make sure to start at the painters tape and paint up towards the stem.
I could have been more careful. I also placed the pumpkin in a grocery bag while glitter bombing, to easily dispose of crazy glitter.


Hopefully I can get around to a "neutral fall decor" post soon. I'm really picky about seasonal decor for some reason, and it's always a challenge to get ready for the holidays. Hope everyone is enjoying the fall! 

Friday, August 16, 2013

Converting a Buffet to a Media Unit

Hello and Happy Friday! I'm back from California and catching up on sleep. This post isn't related to my recent trip, but I've been wanting to share this for a couple weeks, so here it is! Our 6 month furniture search has come to an end!

Matthew and I are both bargain shoppers, so finding the perfect piece for under our TV was taking forever.  It was so hard to pull the trigger because we really wanted a buffet piece that we would to convert into a media unit. We also have a distinct theme going on in our open living/dining/kitchen space (Which is very navy and reclaimed wood-ish). Well I finally found something I loved at HomeGoods, and within 5 minutes of seeing it I was telling the salespeople to take it off the floor!

HomeGoods put it on a paid hold, so I had seven days to pick it up, and could return it just as easily. I told Matt if he hated it we could take it back, but we were buying this piece and testing it out no matter what! 

Now onto the conversion process, you need this huge drill bit specifically for drilling the perfect hole. Which we borrowed from our neighbors. 


Voila! We finally have the missing piece to our living room. 


Now, time to tackle the walls and add shelves around it.  Has anybody else used a buffet piece for a media unit? Have a good weekend everybody! 


Monday, June 10, 2013

A Curb Appeal Weekend

Hello my dearests! I hope everyone had a good weekend. Matthew and I finally got to spend a low-key weekend by the house, and we loved every minute of it. Well there was one snag, but that requires a whole new post. But onto my favorite moment of the weekend, right here my friends. I bring you Rocks!!! Yes rocks. Lemme splain'.

So basically, we have this ugly ditch in our front yard. For inner-city homes in Houston this is really common, you just gotta give them some love and pretty them up.  Since this curb appeal project has been on our to-do list since we moved in, we decided it was time to dig in. Literally.  So nine months later we get to check the box! Heck yes!

The details: We went to Yale Stone down the block, bought "pavers" as Spence would call them, and then one yard of this black/gray stone. 


 They came by to drop it off, which was our favorite part. Happy hubs right there! 

And then we (as in Matt and Spence) leveled the area and shoveled the rocks into place. 


I got to stand-by and play with little Miss Presley (our neighbor) as Spencer helped Matt. 


And here is the final result!

Now if only my vines would hurry up and grow! Anybody else into curb appeal lately? With summer it's always on my mind!

-Tessy

Tuesday, February 19, 2013

Unfinished Projects

Happy Tuesday! Hi to all the new faces around these parts!  If you’re like me your significant other had the day off, which left you very confused on Monday morning. I kept thinking, when is he going to wake up? Should I wake him? Then it dawned on me, its President’s day. No complaints here, I got a sweet lunch date out of it. Curbside service to one of our fave downtown diners. Anywho. I did something this weekend that I Loathe. Finish projects. I love to start projects, dream up what I am going for, search blogs and pinterest. THINK about what I am going to do some more (Yes, I am a muller, but details make all the difference IMHO).
Then I run out in a mad dash…..kind of like a manic person.. to buy all my supplies ( I generally forget the most basic items… and have to go back). But this weekend, I got down to it. We finally painted the foyer, After months of thinking about a green or a blue or a gray color, and a swing and miss at home depot, I found the perfect color.
Why is it perfect? Because it looks blue gray during the day, and seafoam-green-gray at night. HA! The best of both worlds for an indecisive person like me. Seriously tho, I might continue on with this color in our master bedroom, the office, and we already decided to finish up to the 2ndfloor beyond the foyer. Pictures to come, there just hasn’t been any sunlight (Boo on you rain).

We tackled those cornice boards, I bought the fabric and batting a month ago.

And finally painted a copper mirror that just was not jiving in our living room.
Heres the general direction of our dining room... still a lot to left but I am finally feeling like its coming together ...


And no pictures because I simply forgot, but we finally touched up and finished the built-in shelves. We painted the back of the shelves a very dark (shocker) navy blue. If I could make my whole house navy blue… I probably would.

Now all these house projects have been spurned by our inaugural book club meeting, kicking off this Thursday. We are reading No Easy Day, the story about capturing Osama Bin Laden, and I’m only on page 70 of the book. EEEEK. It's really good so far, I flew through it last night. Be back soon, anddd (groan) I owe you a Yeast-free diet check in!
-Tessy


Thursday, February 14, 2013

SPD: A Bird Baby Shower!


Hellloo my dearests. I know everyone has valentine’s day on the brain, but not I! maybe that’s a product of getting married, but honestly a low-key dinner tonight is all that we wanted. I’ve never even been that into Valentine’s day, but really I’ll spare you the details of how trivial I think Valentine’s day is. I don’t know where were are going as of yet, which a surprise of any sort gets me excited.

Anyways, I want to talk about something else that just warms my heart. Baby showers! My friend Jennifer and her mom Debbie asked Emily and I to help host her shower, and I was pretty stoked. Not even gonna lie! Let me start with we all used to be crazy college roomies, I mean we got matching tattoos together, romped around 6th street…. now fast forward a decade later….and we are standing in each other’s weddings and throwing baby showers. The bonds you make with girl friends, the history you create as you are there for each other through such important milestones is just wild. I always have a blast looking back. Because I am just cheesy like that!But anywho..
 
Jennifer’s nursery theme was all about birds and branches, thus we went with a “Tweet Baby Girl” theme. We freaking ran with it! Here was our pinterest inspiration:
 
 
And VOILAAAAA –
 

I think dressing a table really makes everything come together. Gives it that extra pop, and it was just fabric from Hobby Lobbyf or 2.99 a yard, spray painted clothespins,  some ribbon for 2 bucks at walmart. We bought the bird houses from Hobby lobby for 6 bucks a piece, and spray painted those as well.
 
cupcakes fo yo face!

Every shower needs a sing! Emily and Stan made this one below,the letters were $1.27 each, and they used a staple gun to attach the letters to the rope. We bought that fake branch from Hobby Lobby and we thought it made all the difference.


Also – the Mom-to-be’s only request was a macaroni bar, since it was her biggest craving during pregnancy. So a macaroni bar she got! I dont know about you guys, but It always boggles my mind that no one serves real food at baby showers. I mean come on! Feed your guests!


But really the best part was watching her open all her gifts. Molly's closet is more full than mine! Freaking awesomeness.


I really can’t wait to meet her little girl, and see her little boy get a baby sister.
Congrats to Jenn Jack and Connor!
 
Tessy

Monday, January 7, 2013

Painting a Stripe Wall part Deux - Tips and Tricks

A day late (a business day that is) but not a buck short! Here is the continuation of the striped wall; day two and our second round of taping with frogger tape.

I know there are a million blogs out there with a how to paint a striped wall post, but I just wanted to share how it went for us :) I also have to say, that tackling a major project right before the new year, somehow made me feel like 2013 would get a special blessing with more tackled projects! Me and my superstitions..

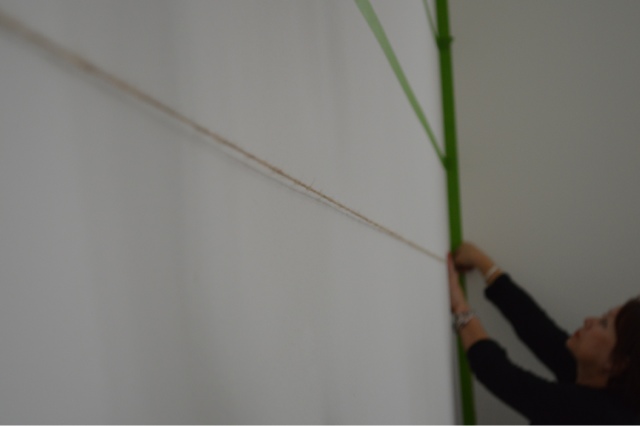
Our second go at this we decided to use only a one long strip of tape and instead of the "strip by strip method" we used the night before. We also used a string to guide the tape. Not the most conventional of methods, but hey it worked for us. I heard about a gadget called a laser level, but I did not have one and wasn't making a 15th trip to home depot. I also assume anything with the word "laser" in it = too much tessy moolah. so measured points and string it was. We used the credit card method to smooth out any airbubbles on the frogger tape, to make sure it was super stuck. Super duper stuck! And of course you peel the tape immediately, before the paint dries to avoid cracking.


Taping


ready to go- It's important to notice the bigger stripe and smaller stripes. Our wall was a total of 106 inches, which divided by 9 comes out to 11.77, so we rounded each stripe to 11.75 inches. The smaller stripe is the lighter stripe, and the tape is included in the lighter stripes 11.75 inches. This was the hardest thing for me to wrap my head around at first! (And if you dont get it reread this sentence until you do!) and remember, start at the TOP. One stripe will always be a little off, so its best at the bottom and out of visability. 
Pull tape immediately to avoid cracking.


husband slept through it all. remember that casino trip I mentioned?
and voila!


These two paint colors are: Alabaster by Sherwin Williams in flat finish, and Gray Moose by Martha Stewart in satin finish.

I'll post more pictures later, when the room is finished. Still have a few items to go!

-Happy Monday!
09 10