
A day late (a business day that is) but not a buck short! Here is the continuation of the striped wall; day two and our second round of taping with frogger tape.
I know there are a million blogs out there with a how to paint a striped wall post, but I just wanted to share how it went for us :) I also have to say, that tackling a major project right before the new year, somehow made me feel like 2013 would get a special blessing with more tackled projects! Me and my superstitions..
Our second go at this we decided to use only a one long strip of tape and instead of the "strip by strip method" we used the night before. We also used a string to guide the tape. Not the most conventional of methods, but hey it worked for us. I heard about a gadget called a laser level, but I did not have one and wasn't making a 15th trip to home depot. I also assume anything with the word "laser" in it = too much tessy moolah. so measured points and string it was. We used the credit card method to smooth out any airbubbles on the frogger tape, to make sure it was super stuck. Super duper stuck! And of course you peel the tape immediately, before the paint dries to avoid cracking.

Taping
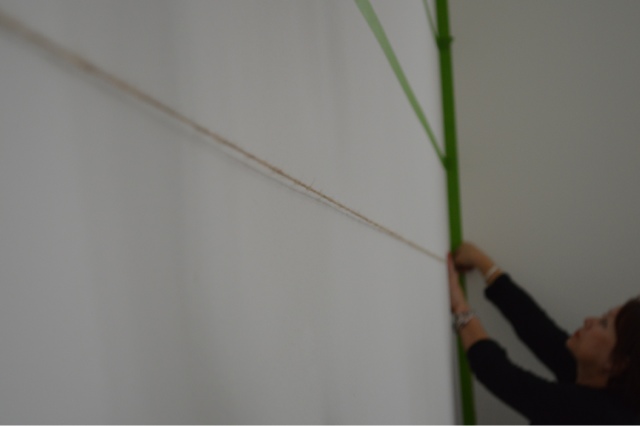


ready to go- It's important to notice the bigger stripe and smaller stripes. Our wall was a total of 106 inches, which divided by 9 comes out to 11.77, so we rounded each stripe to 11.75 inches. The smaller stripe is the lighter stripe, and the tape is included in the lighter stripes 11.75 inches. This was the hardest thing for me to wrap my head around at first! (And if you dont get it reread this sentence until you do!) and remember, start at the TOP. One stripe will always be a little off, so its best at the bottom and out of visability.

Pull tape immediately to avoid cracking.


husband slept through it all. remember that casino trip I mentioned?

and voila!

These two paint colors are: Alabaster by Sherwin Williams in flat finish, and Gray Moose by Martha Stewart in satin finish.
I'll post more pictures later, when the room is finished. Still have a few items to go!
-Happy Monday!
11 comments:
OMG - I absolutely love this! I've been wanting to do something like this in my house for forever! Great job!
Holy moly it looks GREAT!!! How long did it take you to do the second round of taping (and how many people)? I need to plan accordingly lol. Our room is already the color of your darker stripes, so we need to go back and do the white/light. Looks so so good. PS - where is the table from??
This makes me want to stripe one of my walls. Looks great Tess
It looks SO GOOD! :) I love it!
AHH I LOVE IT!
the wall looks great and matt sleeping is hilarious!!
Love striped walls. Hate all the planning. Looks great!
Looks awesome!!! Thanks for sharing the how-to, I WILL use this one day!
That looks so pretty!!
http://dreamingenfrancais.blogspot.com/
LOVE!!!
Looks great! And love that table!
Post a Comment